


Updated: August 22nd, 2022
Recording drums is a science of its own, but with the right amount of skills, equipment and patience you can achieve a great sound. Drum recording involves a set of skills It is important to have a clear vision of the type of sound that you would like to achieve. The amount of time spent on recording can be very consuming especially when there is no direction in place.
The best drum heads used will dictate the type of skills and equipment required. Acoustic drums require an acoustically designed room and additional post-production work in order to perfect the sound. Recording an electronic drum kit has it’s advantages and a live room and microphone set up is not required. No matter whether you are playing an acoustic or electronic kit we have got you covered with our extensive easy to follow how to guide.
|
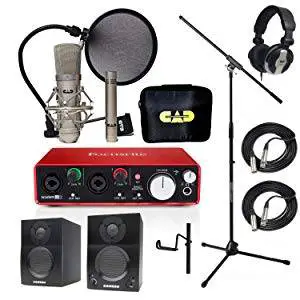
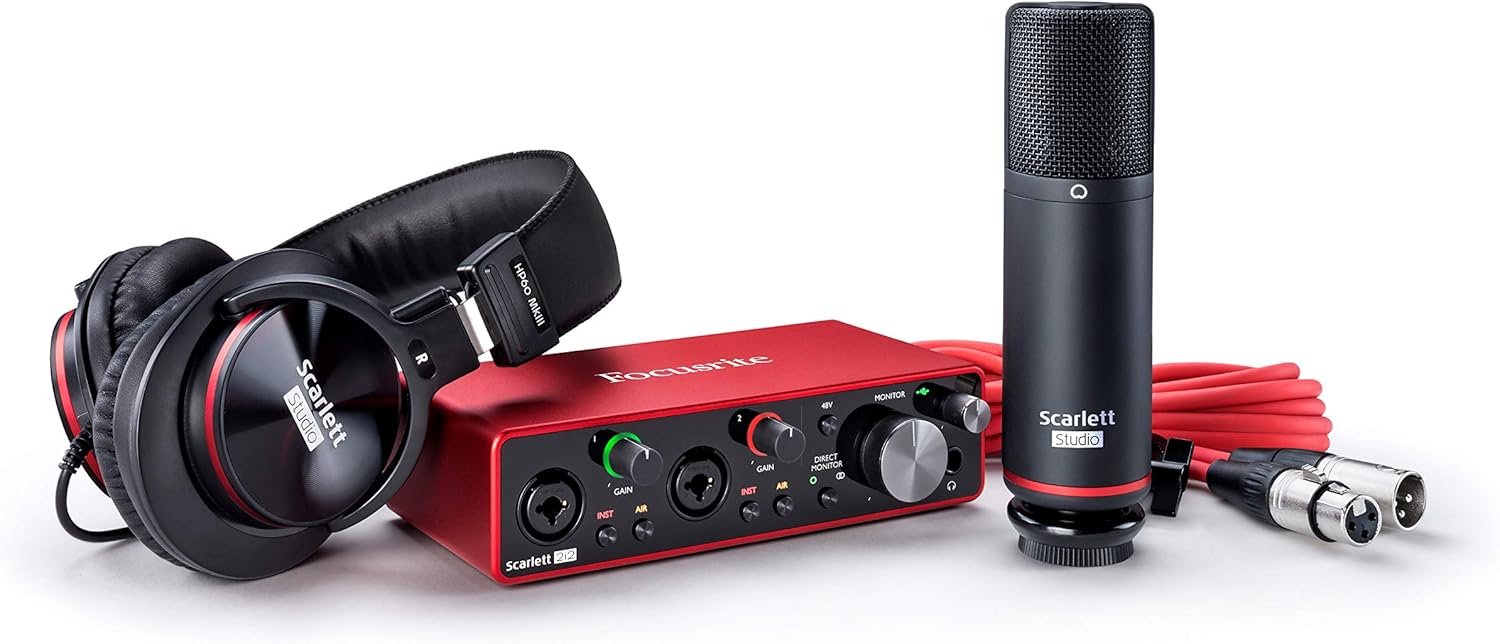
Best Bang For Your Buck
 |
Best Bang For Your Buck
|
Focusrite Scarlett 2i2 Studio (3rd Gen) |
|
VIEW LATEST PRICE |
|
Best For The Money
 |
Best For The Money
|
PreSonus Studio One Recording Bundle |
|
VIEW LATEST PRICE |
|
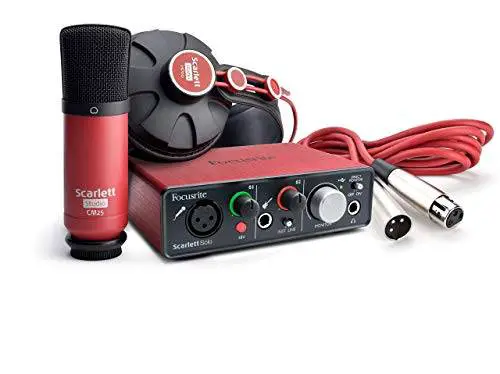
Best for Speed
 |
Best for Speed
|
Focusrite Scarlett Solo Studio USB Audio Interface and Recording Bundle |
|
VIEW LATEST PRICE |
|
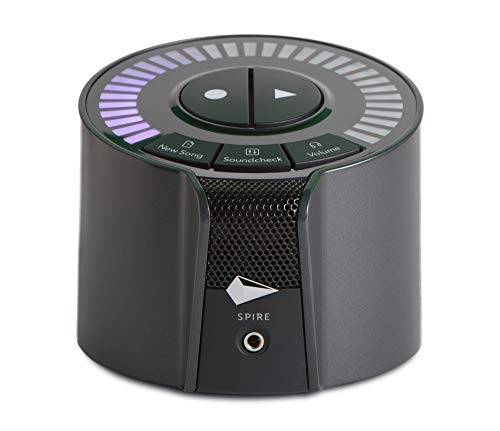
Best Direct Drive Double Pedal
 |
Best Direct Drive Double Pedal
|
iZotope Spire Studio |
|
VIEW LATEST PRICE |


How to Record Drums – The Basics
A great drum recording session requires good preparation and steps that need to be taken. The first step is to start tuning your drums to produce a clear recording. You will need a great sounding instrument. Make sure you pay special attention to your snare, the most important piece in your kit. To prevent any noise on your final recording make sure you tune those toms to get a good low-end girth. The next step is to mic your kick drum in multiple ways according to the design and how many mics you will be using to record. A single boundary microphone placed about three inches away from your drum’s outer head is a popular choice for most home drum recordings.
Adding an extra microphone inside the drum head will block out and prevent an audio bleed caused by your other drums. You can get more options once you mix if you add both. Your snare drum defines the overall sound of your kit. To produce a dynamic blend of tones you can add an extra mic and mixing inputs underneath the drum. A dynamic mic should hover about 1.5 inches above your snare head and above the plastic hoop that lays on the drum surface, placed at an angle towards the center of your drum. As a home recorder, you can get by with producing good sound with only four microphones. Most legendary drummers recorded using the same setup.
With a four mic set up, you want to have one microphone dedicated to your snare and kick drum and two additional mics over your entire drum set. These two mics will capture the sound of your bongos, floor and rack toms, and cymbals. If you have additional mics you can add them to individual drums. You want to pay close attention to your hi-hat cymbal and toms. Adding extra mics will give the production more options to mix with during editing.
It is best to preamp and add compression later. Recording a pure sound without compressing your audio signal during your recording is best as you will not be able to get a clear sound back during drum mixing. Adding a preamp can add subtle amounts of distortion. As soon as you have your microphones set up and you have selected your preamp you can start recording your drums. Have fun mixing it up, trying out different microphones and preamp levels will enable you to develop a unique tone that makes you stand out.
It is much easier to learn how to record electronic drums as an alternative. Electronic drum recording does not require any microphones for recording space. All that you will need is a single channel
MIDI interface that is connected to your computer. MIDI-to-USB cables have an interface embedded in the cable that makes electronic drum recording sessions even easier.
It’s quick and easy to move your MIDI notes around your audio workstation software after making your recording. When recording your MIDI will activate your choice of high-quality professional drum and cymbal recorded sounds.
Recording Equipment Needed
Recording Setting for Optimized Sound
How to record drums in a home setting is very different in comparison to a dedicated recording booth. These booths are for drum recording in professional settings. The wall surrounding the booth is built accordingly with stone or brick, to produce a bright, hard reflective sound most commonly used in a rock style.
The walls may be treated and damped to absorb to prevent adding any additional character to the overall sound. These booths keep the drum sound isolated to prevent it from spilling over onto the microphones. In most home recording studios, these luxury amenities are not possible, however there are ways to improvise.
Acoustic screens are a great way to stop the drum sound from traveling into other instruments and vocal mics especially if your kit is in the same room as the rest of your band. A great way to improvise is with temporary yet effective screens made out of mattresses, cardboard boxes, or single wooden frames. Your overall goal is to isolate your kit as much as possible from the rest of your band.
Although complete isolation is not possible it will be worth every effort.
Suspending a blanket or duvet from your ceiling can prevent a loud backline from leaking into other instruments and vocal mics too. Preparing your recording room is a simple task and can be done cost-effectively. You want to recreate the dampening effect of a professional studio setting. Adding thick blankets or heavy curtains to the walls and room surfaces are recommended to get that same effect.
When choosing your home recording room it’s important to take all of these factors into account especially the following, wooden or tiled rooms will add additional echo to your mix.
Recommended Microphones Per Drum Parts
There are a few things to consider when choosing the right mics to use during your drum recording session.
-
How many microphones?
The number of mics that you are going to use. If you are recording drums with one mic you will need a large condenser to produce a fuller sound. This type of mic will accurately capture the drum set best in comparison to a dynamic microphone.

-
Dynamic mics
These mics are great for increasing volume. They are durable and able to take the pound and sound of the kick drum or snare. If you decide to place a mic at every drum it is recommended that you would use a dynamic mic with each kick, snare, and toms.
-
Condenser mics
These microphones are available in small or large diaphragms and are the most commonly used as overheads. When placed above your drums it can capture the overall sound from a short distance.
-
Overhead mics
These mics are placed above the kit to capture the overall sound from a close distance. Condenser mics can capture all the subtleties of the drum kit, from the swash of the cymbals to the low finish of the kick drum.
-
Ribbon microphones
Ribbon mics are a great choice but are rather costly if you are using a few. These mics have a much smoother sound but more fragile than condensers and dynamic options.
Each microphone will produce a different sound. You need to experiment with the type of mic and placement to develop your unique sound.
Kick drums require dynamic microphones that are strong to withstand high levels of sound pressure. They are not as sensitive as condenser microphones. Condenser receivers have delicate coils and require phantom power. The best-suited mic for snare drums would be one that can handle loud volumes without any distortion. A mic with a tight cardioid pattern will be able to minimize any bleed from other drums. A durable casing will be able to sustain heavy beatings without suffering any damage.
The hi-hat is an important symbol that requires its microphone. A cardioid small diaphragm condenser is the best-suited mic for your hi-hat. It can capture high-frequency detail while rejecting off-axis sounds caused by other instruments. It is not necessary to mic toms individually because they do get decent coverage from your overhead microphones. Should you choose to mic your toms a classic dynamic mic is best and will produce a rounder and fuller sound.
Ride/ crash cymbals do not require a separate mic. The best option to add to these cymbals is a small diaphragm condenser mics.
Recording drums with 2 mics
When recording with 2 mics you have the option to change to overhead mic placement over the drummer. This placement will capture the ambiance and room tone. The second mic can be placed in front of your drum kit. If you place both overheads you will miss out on getting enough kick drums. Its pair of large-diaphragm condenser microphones are well suited when recording with two mics.
Dynamic mics can also be used and will produce great sound results.
Ribbon mics are the best-suited mics for a 2 mic recording setup as they can pick up sounds equally from either side of the mic.
One mic should be placed on top of the boom stand and the other mic should stand behind the drummer’s stool.
There are a few different placement options that you can try to find out what suits your drum recording setup best. A mic can be added directly in the middle of your set, higher enough to prevent your sticks from hitting it. You can place a mic over the drummer’s head at an angle to pick up the room and front of your drum kit. This placement does require finer tweaking to find the perfect spot. Careful placement will provide a bigger space to record in. The height and proximity of your mic placement will have a dramatic change in your sound. It is best to experiment with many different placements to optimize the sound produced before adding in any additional compression or equalizer. EQ
Cables
Cables are the most important accessory of any recording space and a lot of knowledge is required. You will need enough XLR 3-pin input cables for the number of mics that you plan on using during your drum recording session. It’s important to make sure that these cables are durable, high quality, and long enough to get between your mic and audio interface. Gold plated XLR cables that are a variety of short and at least 15 feet long are best suited.
Hardware
The amount of hardware required will depend greatly on the number of mics you will be using during your drum recording session.
- Microphone Stands – You will need three tall mic stands for your overhead mics, hi-hat, toms, and room mic. You may require up to six depending on whether or not you have clip-on tom mics.
- Duct tape – to secure cables to flooring
- Velcro cable ties – to prevent tangled cables and cable adapters
Audio interfaces
Consider your interface the interpreter that deciphers the sound from the mics so your PC software can comprehend and record it. Most interfaces are easily connected to your pc via Firewire or USB. When choosing an audio interface it is very important to make sure that there are enough XLR inputs for each microphone.
There are many interfaces available each producing its sound. For best performance, it’s important to choose a high-quality option. A cheaper option can produce a latency or hissing noise.
Preamplifiers
The main function of a preamp is to produce a clearer, less distorted sound and increase your mic signal levels. You can find audio interfaces that have built-in preamps. External preamps are also an option if you would like to upgrade your drum recording kit.
The Software
A DAW (digital audio workstation) is required to record your drumming and control the sound. There are many different home recording packages available that are perfect for starting and others with additional features for more experienced recorders. You can find most digital audio workstations pre-installed on any pc. They are relatively easy to use, free and take up less processing power than other digital workstations. There are a few different ways that you can record your electronic drums. You can sound it straight from the module, record a MIDI performance and then add in your drums afterward through the software. You will then be able to trigger your sounds using pc software as you are playing. There are three different ways to record your drums depending on the amount of sound control and drum mix you would like to have.
- Module – module recording allows you to choose the type of instruments that you would like to play and edit. You can then record your drums as an audio track. There are many different modules to choose from. You can record a separate stereo track and on an individual channel you can record each drum and cymbal. Multi-track recorders like DAW software, analogue mixer or a multi-track recorder will give you equal control over each part of your drum kit when using multiple microphones.
- MIDI – Your drum recording is recorded on to your computer as MIDI data. This is stored into a file that can be later and edited through software.
- Triggering – this type of software allows your drums to be recorded at the same time as it allows you to trigger your drums as you play.
Recording Skills you need to develop
Drum recording can be expensive and time-consuming and will require certain skills. Once you have finished your recordings you will need to spend a lot of time in post-production which requires a good set of skills.
The best way to record your drums is by producing the best quality of sound in the most effective way. Whether you choose to record an electronic drum kit or an acoustic the premise is the same. It is vitally important that you know the material well when playing. Recording drums is not just about practicing and rehearsing. Some many important factors and skills are often unnoticed as a drummer or engineer.
As a drummer these are important factors to take into account
Drums are often recording first in any studio professional setting. As a drummer you need to get used to playing alone and know your tracks well.
-
- Practice – Until there is no room left for error. Check out this great practice routine. This will help you to accommodate any necessary changes to your normal set up once mics have been placed.
- Be prepared – Drum charts and notes written beforehand for every track is important especially if nerves settle in during your recording session. Make sure that you make note of any drum less sections. How are you going to record? Put a plan in place whether you will be recording on your own or with your whole band. Keep a checklist of everything that you will need like extra drum sticks or duct tape.
- Stamina – Consistent practice on your drum kit or great set of drum pads will improve your stamina. You could be recording for many hours running through each track a few times and you need to be prepared for this.
- Listen – Spend time recording your practice sessions on your phone or laptop and listen to yourself playing. This is a great way to improve your technique and sound, you don’t want your recordings to be the first time you hear yourself play. You can also check out lots of free entry level recording software available.
Drum Skills required
- Balance: You need to achieve a good balance between each drum head and cymbal. Carefully listen to your recording to find any sound that is suppressing the rest of your drum kit. Your next step is to work on it and make the necessary changes.
- Timing: Hitting the right note at the right time is important, you won’t have any room for error here. Make sure that your flow and timing of every beat is consistent.
- Fills: It is important to practice transitioning from the groove to the drum fill especially your timing on the complex fills. It’s important to find out how to not rush your fills.

- Tuning: Make sure that your kit is properly tuned to get the best sound. It is important to look for any wear and tear that would require your heads to be replaced.
- Tempo: Work this out for each track and keep note of any changes and where they are. You will add to communicate this with your engineer if you are recording in a studio setting. If not it is still important to pay attention to. Get comfortable using a metronome that will keep your tempo on track. If you are not using one it can make it more difficult to edit later.
- Velocity: Make sure that you are able to increase and decrease your velocity as required using both your legs and arms. This way your recording will be much clearer and you will have a better ability to adjust your volume levels as needed.
Skills and tips for engineers recording drums
Sound engineers need to understand the role of the drummer. The drummer lays the foundation for any track they provide the heartbeat and the groove that makes the music come alive. All drummers like most musicians have their way of playing and unique sound. The level of ability and skill will always differ depending on experience. Drumming requires a lot of energy and variation. The engineer must be able to listen closely to determine what works best. As a sound engineer, certain fundamental skills are required to record drums effectively.
- Microphone placement: The choice of mic that is chosen and placement will affect the final sound. It is important to know the different drum head mic requirements.
- Tracking: These skills are important when recording multiple tracks of sound information at the same time. You need to be able to determine which strategy to use for different situations.
- Software skills: You will need to be able to operate a digital audio workstation as well as multiple different professional audio tools.
- Plugins: These add functionality to your digital audio workspace. Your knowledge of analog compressor emulators to bass wobble synths will enhance the overall sound.
- Mixing skills: This is where your technical and creative skills collide resulting in a great track. You will need the skills to record the drums, sequence MIDI and effects and create the perfect equilibrium between the different elements and the track.
- Phase: You need to be able to understand the phase and how it affects the recording, mastering and mixing. As an engineer you will need the skills to pick up if something sounds off especially when working on different mixes. When adding two kick drum mixes together it is important to listen closely to make sure that there is a clear sound that does not sound too muddy or lack definition. The invert phase is just as important and can make a huge difference when rescuing tracks that have phase problems.
- Subtractive EQ: A good knowledge of EQ will alter or reduce any unwanted frequencies required to manipulate your overall sound. This can be very beneficial when working on tracks. You will need to know how and when to remove this and how it affects the overall emotion of the track.
- RMS Management: Root mean square is used to define the average of variation in your audio or sound.This is important to get the correct sound volume achieved without compromising on great sound quality.
- Great organization skills: As a sound engineer you will be spending hours editing and working with equipment, gear and tools while connecting a ton of cables. Choosing a great digital workstation and having an outline of your day-to-day activities will cut down the time.
- Music theory: It’s important to have a solid understanding of theory.
- Good communication skills: Great communication is key to any great recording session especially when working with musicians.
Summary:
No matter whether you are recording acoustic with one or multiple mics or electronic drums preparation is important. Drum recording takes a lot of time, good management, solid playing skills with a great understanding of the technical elements involved. A great way to start is to record yourself playing. Listen closely to your recording and take notes. Is your timing out? Does your kick drum overpower your kit? Keep practicing and recording until you have a perfect balance, timing, tempo, and velocity. Using a metronome is a great tool to work on your timing especially when you are practicing without your band.
We hope that this guide to learning how to record your drums has given you the necessary skills and fundamental elements required. Once you have your recording room and mics set up and have chosen your preamp it’s time to put those skills to use to create your unique sound.